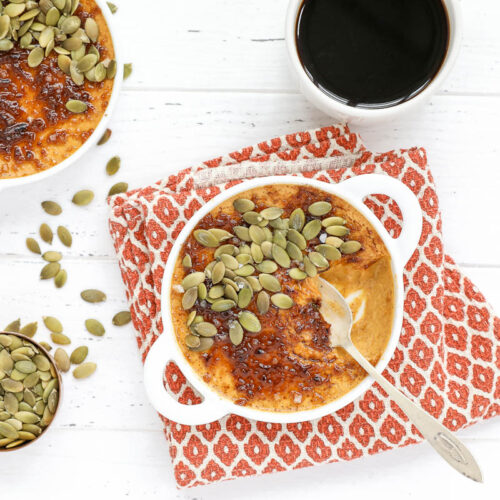
Pumpkin Crème Brûlée. Pure pumpkin puree, Greek yogurt, egg yolks, brown sugar and pumpkin pie spice come together for a creamy, luxurious dessert that celebrates all the warming flavors of fall. And, the best thing about these desserts is that you probably have all of these ingredients on hand. This is the perfect harvest pumpkin dessert that’ll wow your guests.
If you thought crème brûlée was only for fancy restaurants, think again! These elegant crème brûlées may look fancy, but they are the easiest and simplest thing to make. The hardest part of the process is letting them chill in the refrigerator for a few hours to set. The wait is worth it.
And, you can make these salted pumpkin crème brûlées a day ahead of time, just brûlée the top and add the pumpkin seeds just before serving. I used a kitchen torch to brûlée the tops, but feel free to use your oven’s broiler. Just keep an eye on the dessert so the sugar doesn’t get overly burnt.
Ingredients you’ll need for these Pumpkin Crème Brûlées:
- whole milk vanilla Greek yogurt
- pumpkin puree (don’t use pumpkin pie filling, as that’s sweetened and spiced)
- dark brown sugar
- egg yolks
- vanilla extract
- kosher salt
- pumpkin seeds
Here’s how to make this Salted Pumpkin Crème Brûlée (full details in recipe card below):
-
You’ll whisk together yogurt, pumpkin, dark brown sugar, egg yolks, pumpkin pie spice, vanilla and salt then divide mixture among ramekins.
-
Place ramekins in a roasting pan. Add hot water to the pan so it hits halfway up the ramekins. Bake for approximately 30-35 minutes, until custard starts to set. Let cool. Cover ramekins tightly with plastic wrap and chill at least 5 hours.
-
When ready to serve, preheat the broiler or get kitchen torch. Sprinkle each ramekin with brown sugar and put on a baking sheet. Broil for 1-2 minutes, keeping a close eye on the brulees so that they don’t burn. Alternatively, turn on kitchen torch and place close to the brulees, melting the sugar, burning just slightly. Refrigerate 10 minutes just until sugar hardens.
-
Serve topped with pumpkin seeds and sprinkled with salt.
If you love pumpkin, these Salted Pumpkin Crème Brûlées won’t disappoint. They’re creamy, pumpkin-y, slightly sweet and slightly salty (I love sweet/salty combos). Basically like a pumpkin custard with a crunchy, sugary top. Greek yogurt replaces the cream and we’ve topped the brûlées with pumpkin seeds for some added crunch, fiber, healthy fats and earthy goodness.
This recipe serves 2, but can easily be doubled if you’re serving more family or friends.

Pumpkin Crème Brûlée
Ingredients
- 3/4 cup whole milk or low-fat vanilla Greek yogurt (you can also use plain for a lower sugar version)
- 1/2 cup pumpkin puree not pumpkin pie filling
- 1/4 cup dark brown sugar packed
- 2 large egg yolks
- 1 teaspoon vanilla extract
- 1/8 teaspoon kosher salt
For serving
- 2 tablespoons dark brown sugar
- 1/4 cup pumpkin seeds
- 1/8 teaspoon kosher salt
Instructions
- Preheat oven to 325°F.
- Whisk together yogurt, pumpkin, ¼ cup dark brown sugar, egg yolks, pumpkin pie spice, vanilla and salt in medium mixing bowl. Divide mixture among two 3.5 oz ramekins.
- Place ramekins in a roasting pan. Add hot water to the pan so it hits halfway up the ramekins. Bake for approximately 30-35 minutes, until custard starts to set. Remove from oven and let cool.
- Cover ramekins tightly with plastic wrap and chill at least 5 hours.
- When ready to serve, preheat the broiler or get kitchen torch. Sprinkle each ramekin with 1 tablespoon brown sugar and put on a baking sheet. Broil for 1-2 minutes, keeping a close eye on the brulees so that they don't burn. Alternatively, turn on kitchen torch and place close to the brulees, melting the sugar, burning just slightly. Refrigerate 10 minutes just until sugar hardens.
- Serve topped with pumpkin seeds and sprinkled with salt.
Notes
Nutrition
PIN this Salted Pumpkin Crème Brûlée for later:
If you’re looking for more pumpkin recipes, don’t miss these!
- Baked Brie with Pumpkin Butter and Walnuts
- Cranberry Pumpkin Butter
- Pumpkin Muffins with Spiced Cream Cheese
This recipe was originally posted on Sep 9, 2014th, but has been updated with new images and better directions.


Leave a Comment